Reflow Oven T-962A – A Review
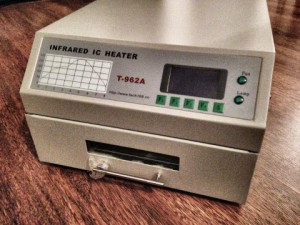 If you are tinkering, doing electronics, and/or soldering you might already have had contact with surface-mounted devices or, in short, “SMDs”. Of course, soldering some of these tiny parts by hand is possible. But there are really tiny SMD parts as well as packages that cannot be soldered by hand. In that situation, you can think about getting a reflow oven for soldering SMDs. This is review of the reflow oven T-962A.
Introduction
Commercial reflow ovens usually cost in the range of thousands or tens of thousands of dollars. For those of you who just want to do some reflow soldering for home tinkering or small scale series production an often found solution is to build your own reflow-soldering oven out of a toaster. There are online instructions, tutorials, or even whole DIY kits ready to be ordered. If you would like to start with reflow soldering in a slightly more advanced way, you might be interested in the T-962A.
The T-962A is manufactured by Puhuit and comes with these specifications:
- Maximum soldering area: 300×320 mm
- Size: 43×37×26 cm
- Packing Size: 50×43×33 cm
- Rated Power: 1500 W
- Processing Time: 1~8 min
- Power Supply: AC220V/50~60 HZ
- Net Weight: 12.5 kg
- Gross Weight: 14 kg
You can get this oven at Ebay for prices around 550 USD plus shipping.
Features
The reflow oven is advertised with a bunch of features that are listed and commented in the following:
A large infrared soldering area
“Effective soldering area: 300×320mm; this increases the usage range of this machine drastically and makes it an economical investment.”
The soldering area is as large as advertised by the manufacturer. However, there are reports that the heat during a soldering process is not evenly distributed so that you cannot use the whole area reliably.[/toggle]
Choice of different soldering cycles
“Parameters of eight soldering cycles are pre-defined and the entire soldering process can be completed automatically from Preheat, Soak, and Reflow through to Cool Down.”
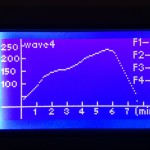
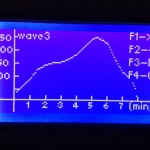
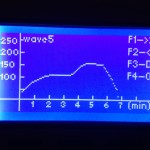
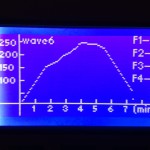
There are eight pre-defined temperature profiles. Two of the profiles can be customized to your own needs. Out of curiosity I tested the customization process once. The user interface is quite self explanatory: For every few seconds of the profile you have to set the target temperature of the profile. I already got satisfactory soldering results with one of the other pre-defined profiles so that I did not use the customization function of the oven extensively.[/toggle]
Special heat up and temperature equalization with all designs
“Uses up to 1500 Watts of energy efficient Infrared heating and air circulation to re-flow solder.”
The oven came with an european and an international plug. Inside the oven there are four infrared elements. The inside temperature is measured with two thermocouples that are mounted on the ceiling of the oven. The oven comes with a circulation system that controls a fan on the back of the oven and pipes fresh air from the outside through the oven and out of the bottom of the oven. I have put the oven on a separate underlay so that I do not have to worry about the heat.
Ergonomic design, practical and easily operated
“Good build quality, but at the same time light weight and a small footprint allows the T962 to be easily bench positioned transported or stored.”
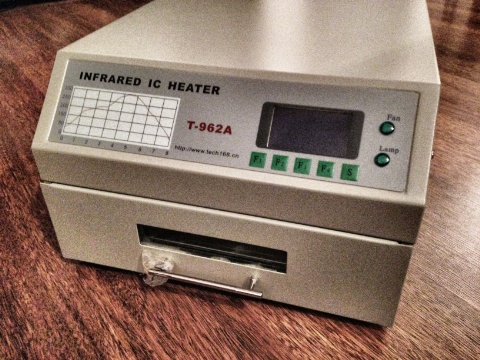
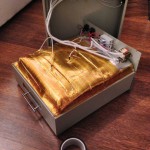
The whole oven fits easily onto the workbench. The construction of the oven makes no shaky impression and the drawer can easily be moved.
Large number of available functions
“The T962 can solder most boss-eyed or double-face PCB boards small parts, for example CHIP, SOP, PLCC, QFP, BGA etc. It is the ideal rework solution from single runs to on-demand small batch production.”
Until now, I have only used this oven for soldering common SMD parts like 0805 and 0605 resistors/capacitors, 74X components, but also for SMD crystals and a few QFN32-sized microcontrollers. After having found the right temperature profile, which depends also on your solder paste, the soldering worked very well for me.
The next section give some more insights into specific topics around this oven.
Order and Shipping
I ordered the oven via my local Ebay site. I had a few questions regarding the order process via Ebay and the customer service of Puhuit was very kind and responded very quickly. The oven came very well packed with bubble wrap.
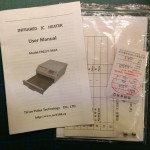
The manual came in a quite-hard-to-read translated English version together with a spare fuse:
First Impressions
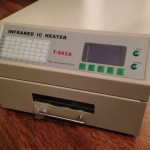
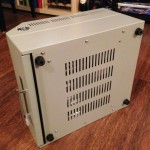
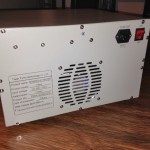
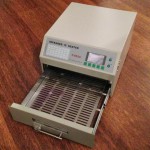
As mentioned above the oven makes a solid impression with respect to it’s construction. Below you can find some images with different views on the oven:
Taking a look inside and “how to get rid of the smell”
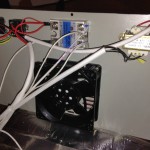
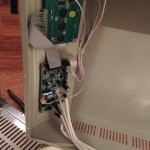
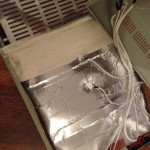
During the first run I noticed a terrible smell that goes far beyond what I would have expected from a typical new electric device. After a short web search I found out that there a quite a low of reports about this already. Inspired by these reports I decided to open the oven and try to take care for that. At least this would give me the opportunity to get some more insights about the hardware of the oven:
The source of the smell is the masking tape which was used generously in the inside to insulate the aluminum foil and the PCBs and wiring. The masking tape can easily be removed and replaced with Kapton tape:
Some other details on the inner hardware can be found on this site.
Operation
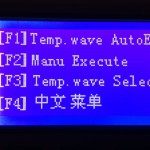
The root menu offers four options:
- Automatic execution of temperature profile
- Manual execution
- Temperatur profile selection
- Language switching (between Chinese and English)
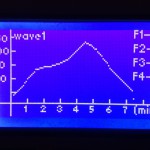
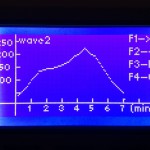
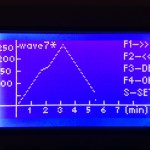
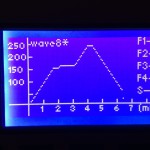
The response of the buttons to presses are not perfectly realized. It can happen that you have to press a key two or three times before the system reacts to your input. All in all, though, the the user interface works reliable and does not bug you too much (or I got used to it). The images below show the root menu and the screens of the profile selection menu:
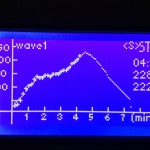
Equipped with some demo boards I made some tests to find a working temperature profile for the materials that I plan to use. I took a look into the specifications of the soldering paste and compared these with the default temperature profiles of the oven. With that I made test runs with the profiles that seemed to be most promising. In the following you can see an image of the display during a profile execution. The target temperature is indicated as solid line, while the measured temperature is indicated as plus signs. As far as I have observed the oven is able to follow the temperature profiles sufficiently. Every few second a new target temperature is set and the IR elements or the fan are activated accordingly. It is a quite basic control, but it works reliably:
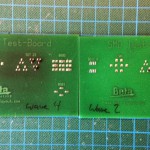
In my case it were the profiles 4, 2, and 1. Below you can see the results of the tests with profiles 4 and 2. While profile 4 was too hot and lead to PCBs and components that turned dark, profile 2, in contrast, lead to far better soldering results. Having run some soldering with profile 2, however, I observed that the soldering process was not completely finished in some cases. With that I came to test profile 1 and this gives satisfactory soldering results so far.
Summary & Outlook
Considering the price compared to the offered functionalities, the T-962A is well worth it’s money in my opinion. It certainly has some flaws like the masking tape related smell or the responsiveness of the buttons. However, soldering a small series of boards with a constant quality is possible with this oven without the need for much tinkering or experimentation.
If you are willing to spend some more dollars on the oven you may be interested in the upgrades for the controller by ES Technical. Their upgrade replaces the original controller and promises to further enhance the reliability of the soldering process with the T-962A. However, a review of this upgrade might be part of another future post. If you are interested, you can find a review of the upgrade kit in this article.
This concludes the review of the reflow soldering oven T-962A.Do you have any open questions regarding the oven? What are your experiences with this oven? You are welcome to comment!



I bought one of these the other day, and on first tests it seemed to work OK.
(Well I removed and replaced the masking tape before even turning it on)
However, I updated the firmware with the better firmware
https://github.com/UnifiedEngineering/T-962-improvements
And I noticed that one of the temperature sensors was reading far too high.
I spent almost a day trying to recalibrate the unit, or find a fault on the PCB, but without any success.
From what I’ve read, I’m not alone with this problem, and looking at the schematic for the controller board, the thermocouple input design is not that good.
So it now looks like I need to use a separate thermocouple input based on the MAX31855 chip.
I guess this is what the controller update from ES Technical also does.
how to configure for a particular ramp T962 infrared oven, I need a wave or curve particulara to apply to the PCB of a cell phone
Thanks for the review. I have been thinking of getting one of these ovens. Have you ever solderd a through hole component with this oven? I was reading that it is possible to solder through hole boards in a reflow oven. Most of my projects have one or two through hole parts.
Why would you review something a raspberrypiuser/luser would never touch?
For those people that are interested in creating their own electronic circuits and design according PCBs this is an interesting article. At least I would have been glad to find such an article when I was looking for this oven.
Generally, this blog is not supposed to be only about the RPi (even though it is a central topic here).
Thanks for sharing. I just got one, but think i will open it and replace the masking tape before use.